

After a while of owning a Technics 1200 turntable, we can grow pretty attached to the device. We rely on its soothing tones to help us relax and enjoy music.
However, over time, you may notice the audio quality decreasing. In that case, it may be time for a quick check-up and some dusting.
So, if you’re wondering how to clean Technics 1200 turntables, you’ve come to the right place. Let’s take a look at what goes into scrubbing the gadget.
10 Steps to Cleaning Technics 1200 Turntable
For thorough cleaning, you should divide the turntable into different sections. Then scrub each part and let them all dry before you reassemble the turntable.
Polishing the Technics 1200 turntable is a simple process. To do that, all you have to do is follow these steps:
Step 1: Gather Your Equipment
The first step of any project is gathering the materials you’ll need. Luckily, you should be able to find most of the equipment in your home for this cleaning process.
- Large soft brush
- Small soft brush
- Sponge
- Cotton swabs
- Soap
- Rubbing alcohol
- Water
- Bowl
- Microfiber towel
- Gloves (optional)
For the cleaning agent, you can use regular dish soap. However, it’s best to find one with minimum scent and color.
Moving on, if you can’t get your hands on a microfiber towel, you can use paper towels. They may leave behind a little residue, though.
That means you’ll need an extra cleaning step at the end.
Step 2: Prepare Your Turntable
Before you begin cleaning, it’s crucial that you prepare the Technics 1200. Start by making sure the device is off.
Then, unplug the turntable from the power. Since you’ll be using water, having a running electrical current can be dangerous.
After that, remove any vinyl records that may still be inside the device on the platter. It’s also a good idea to take out the slip and platter mat if you have them.
Must Read: How to play 180 gram vinyl
Step 3: Disassemble Your Turntable
When you look at your turntable, you’ll notice that it’s not one giant device. It’s actually a group of many smaller parts that come together.
So, for a full cleaning, it’s key that you disassemble the gadget and get into all the nooks and crannies.
For your safety, this is when you should put on a pair of gloves. They’re not necessary, but there are a few sharp edges in the device that may cause scrapes.
To kick off, detach the cover lid that comes with the device. You should be able to see the connection points at the back, and then you can simply unlatch them.
Next, remove the cartridge from the tonearm by unscrewing the support. Then, place the component to the side in a safe area.
Related: How to clean a stylus with magic eraser?
Now you can take out the platter. To do that, place your thumbs in the two circular holes on the sides of the platform.
The platter should lift up, but it may need a little convincing. So, you want to pull on the platform until it detaches. This part is a little tricky because it relies on friction fitting.
If the component is too stubborn and won’t come out, you can gently tap on the spindle and try again.
After you remove the platter, place it upside down on a soft surface. The underside portion of the platform contains sections of the motor mechanism. This means any minor damage can affect the turntable’s performance.
Step 4: Scrub the Lid
The Technics 1200 comes with a plastic lid. It covers the entire surface of the turntable and protects the device from the elements.
So, as you can imagine, this component can get quite dusty. When that happens, the clear plastic of the lid can turn a little cloudy.
Fortunately, there’s an easy fix for this. Here you’ll need a little warm water in a bowl. Add three or four drops of your dish soap into the liquid.
Try to avoid shaking or moving the bowl as much as possible. Doing so may cause the soap to create bubbles, which aren’t great for cleaning electronics.
Then, grab your microfiber towel, dip it into the cleaning solution, and start wiping. The plastic should clear up pretty quickly.
However, if it doesn’t, you may need to use a little polishing solution.
Step 5: Clean the Platter
The platter is usually the messiest part of the turntable. That’s because it has a large surface area and it’s where most of the action takes place.
Every time you touch the platform to place a record, you’re leaving some oils and other debris behind.
After a while, this will create a greasy build-up that’ll dull the shine of your Technics 1200. This is when your sponge will come in handy.
Dip the brush into your bowl of warm, soapy water, and wipe off any excess. Then, scrub the entire platter, while avoiding the underside.
The most challenging section to clean is the side. Because of the curve and all the grooves, it’s difficult to wipe down every spot.
To help you with that, pull out your trusty cotton swabs. Use the fine tips to get in between any hard-to-reach areas.
It’ll take a lot of time, but your platter should look practically new after this. Once that’s done, pick up your microfiber towel and dry the platform thoroughly.
Step 6: Clean the Platter Interior
If you look in the area where your platform used to be, you may notice quite a bit of debris. Even though the platter covers the space, dust can manage to make its way through the seams.
So, depending on how much debris build-up there is, this step will be a little different. With small amounts of dust, use a microfiber or paper towel and simply wipe the area.
However, for years of dust bunnies, you’ll need to disassemble the turntable further.
Look for the two screws on the top of the platter groove and undo them. This should remove the plastic covering from the device.
Now, you exposed most of the turntable, which means you can use a microfiber towel to clean it out. While you do this, be careful not to touch the electrical wirings.
After you do that, return the plastic covering back in place immediately. This will prevent any more dust from accumulating in the space.
Step 7: Clean the Turntable Surface
With the platter interior out of the way, turn your attention to the rest of the turntable. There’s a slider and a turn knob that’ll need a little cleaning.
This section is relatively easy. Using your large brush and rubbing alcohol, wipe down the surface of the device.
Then, dip a cotton swab into rubbing alcohol and go over the knob and buttons. While you do this, ensure that the alcohol isn’t dripping inside the device.
If you do have a bit of a leak, wait for the alcohol to completely evaporate before you continue cleaning.
Step 8: Clean the Tonearm
The next step on our list is cleaning the tonearm. To do that, grab your large brush and fill a spray bottle with a little rubbing alcohol.
Mist the tonearm with a little alcohol and scrub it with the brush. This is simple and straightforward, but it doesn’t always get the job done.
With constant use, the arm can accumulate grease and other debris. In that case, an alcohol rub-down won’t do the trick. You’ll need to detach the tonearm from the turntable and clean it separately.
The user manual that comes with the device should walk you through the removal process. However, this is quite finicky and time-consuming.
So, if you can, try to avoid removing the tonearm and focus on cleaning the outside instead.
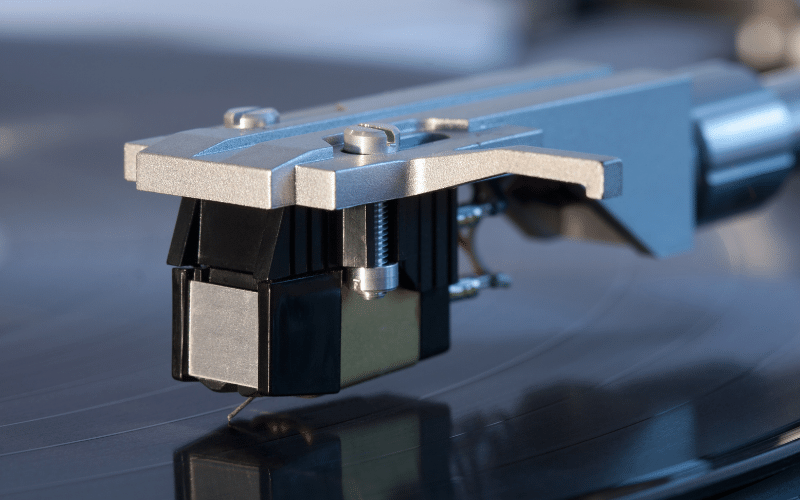
Step 9: Clean the Cartridge
Now, you can turn your attention back to the cartridge, or rather, the stylus. This is the tip of the component that comes into contact with the vinyl record.
That means this is one of the most sensitive parts of the entire device. So, you should take extra care when going through this step.
Pick up your small brush and gently wipe the surface of the stylus.
When that’s done, grab your alcohol and spray a small amount over the entire cartridge. Then, use your microfiber towel to remove any excess liquid.
Next, use cotton swabs to get all the crevices of the component.
Related: How to clean moldy record covers?
Step 10: Reassemble Your Turntable
With all the different parts clean, you can place everything back into place. Before you do that, make sure that the components are completely dry.
Residual moisture can seep into the electronic sections and cause a short circuit.
Gently grab your platter and position it over the plastic cover and spindle. As you lower it down, you’ll notice that it’s a tight fit.
Resist the urge to force the platter down. Instead, slowly wiggle it from side to side until it locks back into place.
After that, pick up your cartridge and reattach it to the tonearm. Then, add the slip and platter mat to the turntable.
Finally, connect the plastic lid to the back of the turntable and enjoy listening to your records.